1. Turn the bicycle face up, and then switch the chain to the difficult gear at the rear (the smallest gear).
2. If you have a caliper (rim) brake, you can use the tire lever on the side to release the brake. If you have a V-shaped brake, push both ends in to reduce the pressure on the brake cable and disconnect it. If you are a disc brake, skip this step.
3. Standing on the end of the bicycle without the chain, open the quick release device. Press down on the wheel with one hand, and then lift the bicycle with the other hand. When you tilt the wheel away from the frame, the wheel should be able to fall off easily. Put the bicycle down so that the side without the chain touches the ground.
4. If your bicycle has a tube axle, you will need to unscrew the tube axle until you can easily remove the entire tube axle from the frame. Then, you can easily remove the wheel.
5. After removing the wheel from the bicycle, start near the spokes, use the concave end of the tire lever to pry the edge of the tire, and do the same on the edge of the rim. Connect the hook end of the tire lever to the nearest spoke.
6. At a few inches from the first tire lever, use the concave end of the second tire lever to move further along the edge of the tire. After a few inches above the rim, continue to do so along the rest of the wheel, so that the side of the lower tire is completely removed from the rim.
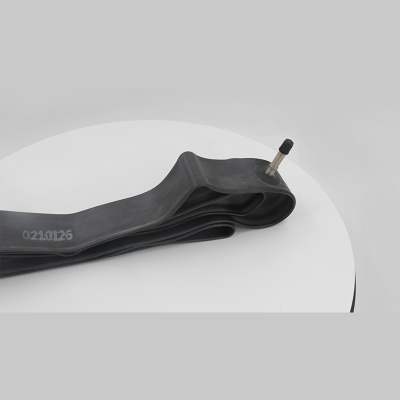
7. Starting from the valve stem (where you connect the pump), pull the original inner tube off the tire.
8. If you want to repair a flat tire, please find the source of the flat tire before replacing the inner tube. Gently groping along the inside of the tire with your fingers, feel for any sharp parts, and then visually check whether there are still objects stuck in the rubber on the outside of the tire. Remove any objects that may immediately cause a puncture again. Note: Sometimes, glass or other small sharp objects can cause a tire puncture. Very carefully groping along the inside of the tire with your fingers.
9. Take your replacement inner tube and fill it with enough air to give it a little shape. This will make it easier to put it in the wheel.
10. Start from the valve stem hole again, insert the valve stem, and then follow the tires to insert the inner tube into the tire in your own way.
11. Starting from the valve again, use two thumbs to push the edge of the tire back into the rim. As you put more tires back into the rim, the operation will become more difficult, but please use your thumb to put the entire tire in it as much as possible. If the tire is too tight, use the concave end of the tire lever to carefully place the rest of the tire into the rim.
12. After you check the rim in your own way and see if there is any obvious squeezing, check if the tire has squeezed into the inner tube by gently pushing the tire to one side.
13. Use an inflator to re-inflate the tire to the proper tire pressure (PSI). The puncture has now been repaired, and it’s time to put the wheel back on the bike.
14. Make sure that the quick release lever is on the opposite side of the chain, and use the end of the quick release device to move the bottom of the chain out of its original position. Place the top of the chain along the smaller gear (the difficult rear gear), and then gently push the bicycle to its original position.
15. Close the quick release lever. At the same time, if you have a caliper or a V-shaped suspension brake, also close the brake.
16. If you have a barrel axle, insert the barrel axle into the frame and hub, then screw it in and close the quick release lever.
17. Lift the rear wheel and quickly rotate the bicycle pedal to ensure that all parts run smoothly.
18. Enjoy the unfinished cycling trip.